We first remove the rear shocks so that we have plenty of up/down
room. We left the bike lowered a little so it doesn't crash down on us when we remove the
shocks. Keep all the shock spacers/shims with the shocks. The lift the bike up a
little but still leave it with the rear wheel just touching the ground.
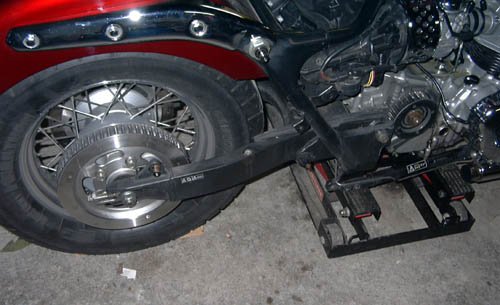
Now
we need to remove the rear axle. To do this, first completely loosen the
chain/belt tension adjusters and shove the rear wheel as far forward as you can
to give you plenty of room to work. Now go get your helper, this part is a two
man job. Remove the rear axle nut and slide it out and remove the rear wheel,
lift the bike up if you need to so it will slide out the rear or the side
without buggaring your rear fender up. Keep all the washers and spacers with the
axle andĀremember their locations for reassembly. If this were a fresh
install, you would also remove the rear sprocket and inspect the cush drive at
this point. If it's worn you will be able to tell by looking at it. The cush
drive is located inside the rear wheel and is one large rubber bumper type
bushing. If it is broken or there are cracks, replace it. Then install the new
belt drive rear sprocket in place of the toothed sprocket.
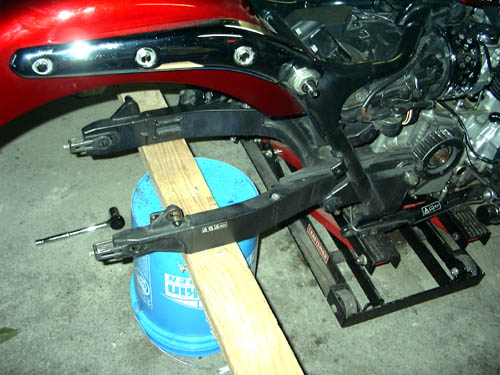
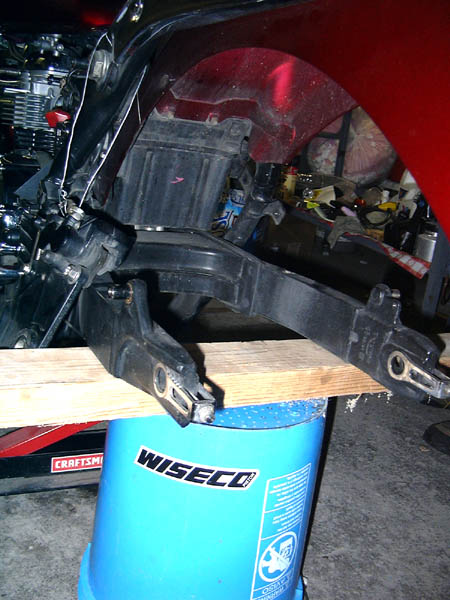
Now the super
duper secret for making this job very easy. With the wheel off, take a 2x4 piece
of wood and put it on top of a 5 gallon bucket like the picture shows. Set the
wood so that BOTH legs of the swingarm are on the wood and it is safely holding
the swing arm securely. Also lift/lower the stand so that the swingarm is nice
and straight out the back, perpendicular with the floor. The swing arm should be
located that when we remove the swingarm axle, it will not fall forward or
backwards at all, nice and centered, just like the picture and you're good to
go.
Notice the rear brake assembly wired up out of the way as well.
On to the next step